Charalambos Geronikolas Reading Time: 6 minutes Intune
Introduction
In my previous post, I explained how to block USB access using Group Policy. In this article, we’ll take it a step further and explore how to achieve the same restriction through Microsoft Intune. This guide will walk you through the process, ensuring your devices remain secure and compliant in a modern cloud-managed environment. Before starting the implementation, let’s describe what Microsoft Intune is.
What is Microsoft Intune?
Microsoft Intune is a cloud-based endpoint management solution that helps organizations manage and secure devices, applications, and data. It is part of the Microsoft Endpoint Manager suite and enables IT administrators to:
- Manage devices remotely (Windows, macOS, iOS, Android) without requiring on-premises infrastructure.
- Enforce security policies such as device compliance, encryption, and access controls.
- Deploy and update applications across managed devices.
- Protect corporate data by integrating with Microsoft 365 and Azure Active Directory for conditional access.
Intune is designed for modern workplaces, allowing businesses to maintain security and compliance while supporting flexible work environments.
For more information, you can visit the official material from Microsoft here. Additionally, you can explore Microsoft Intune Fundamentals on Microsoft Learn here.
How to implement?
Before we dive into the implementation, let’s first review the different approaches available to achieve this configuration
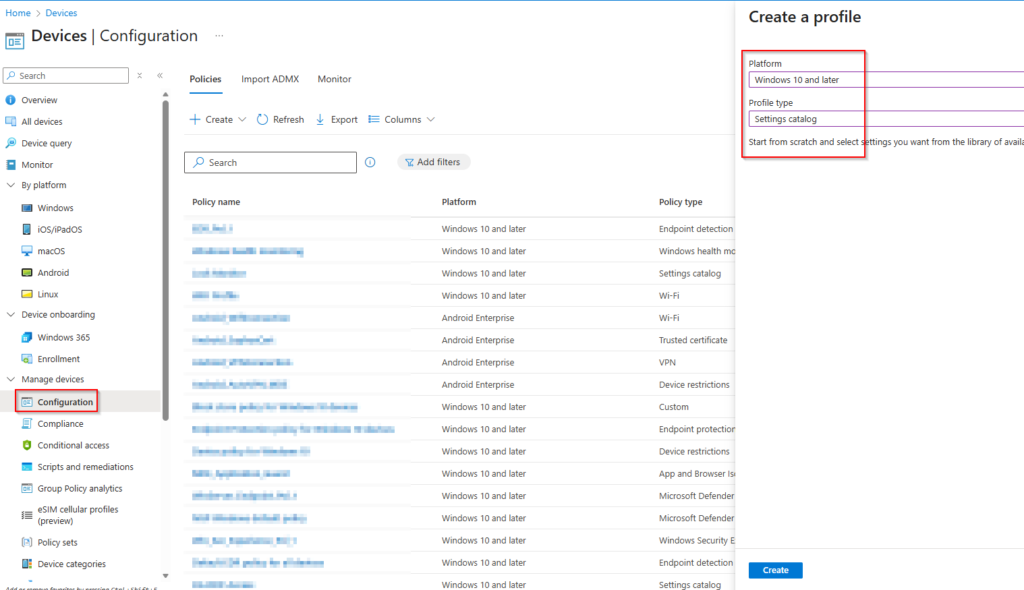
- Navigate to Devices > Configuration and select the Profile Type: Settings Catalog. From there, you can apply the same policies that you would typically configure in your on-premises Active Directory environment. For more details, check out my previous article. here.

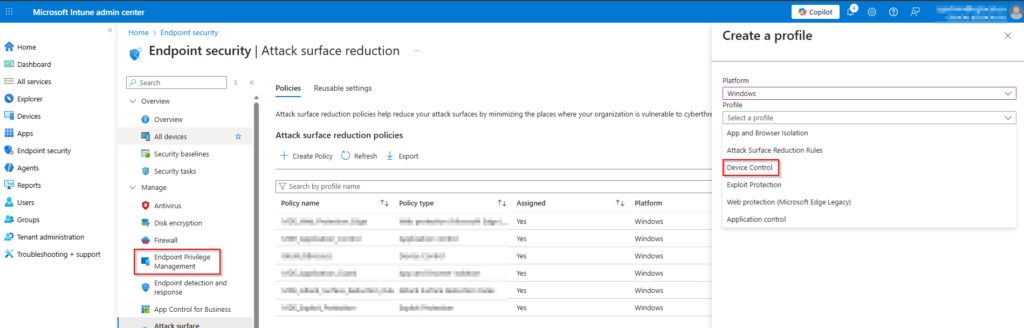
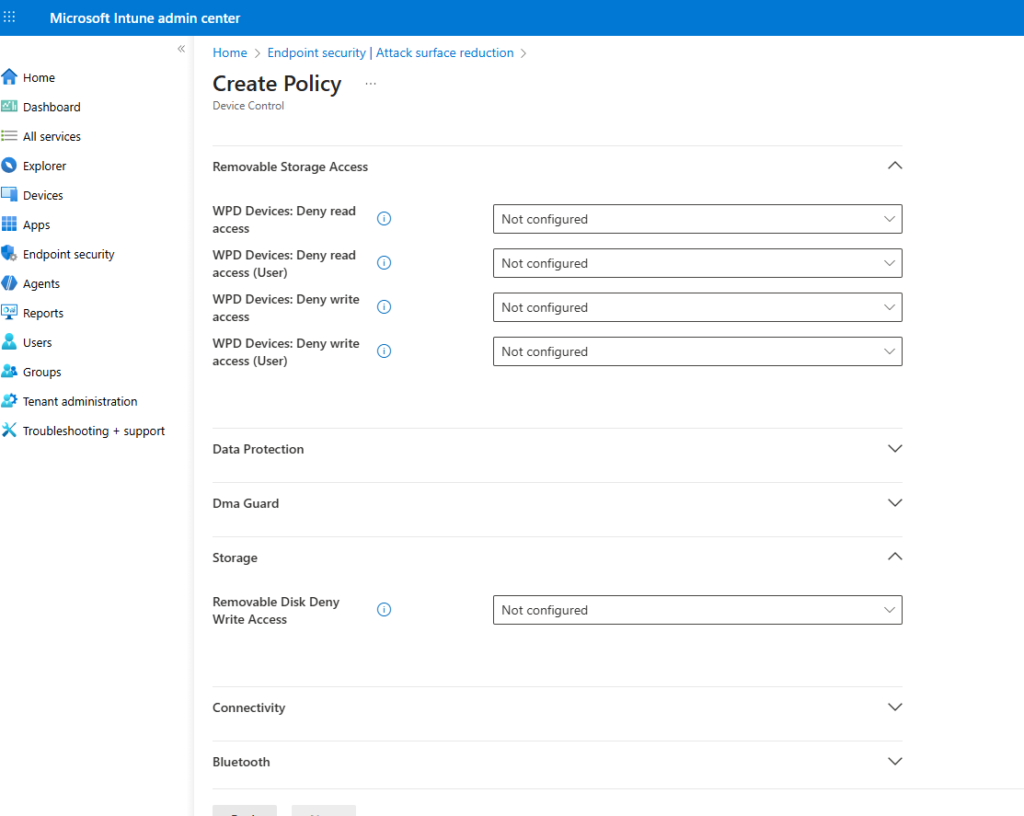
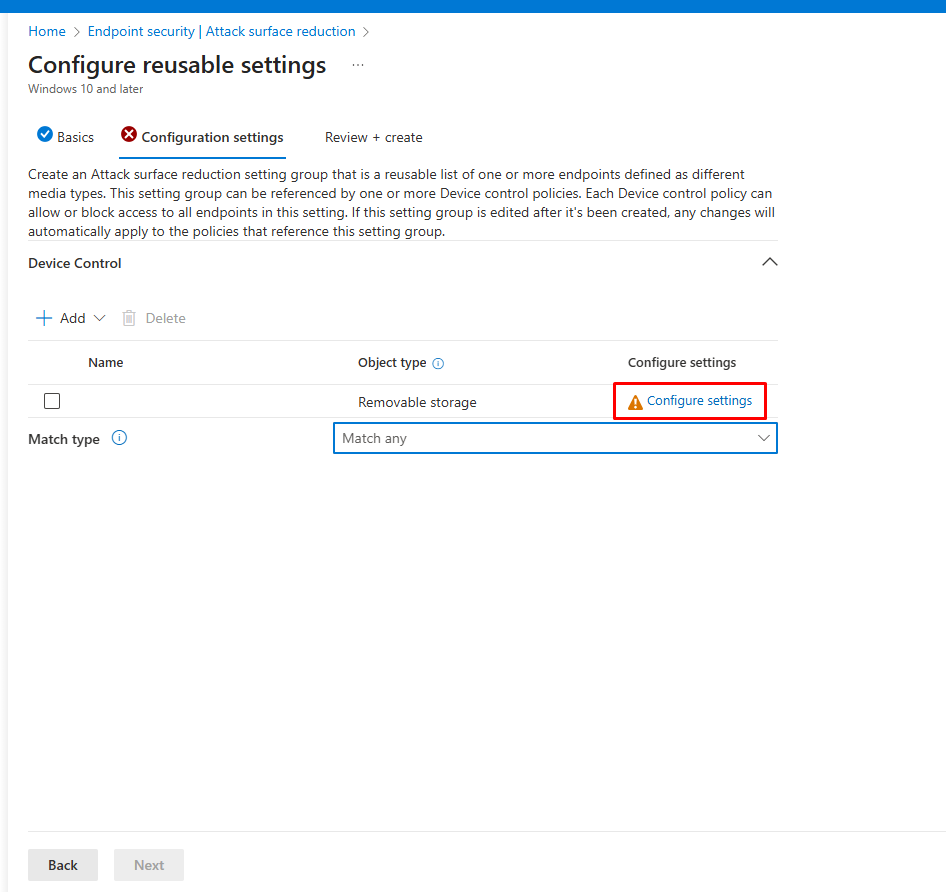
- Go to Endpoint Security > Endpoint Privilege Management, then create an Attack Surface Reduction (ASR) profile. Select the Device Control option and configure the settings listed below.
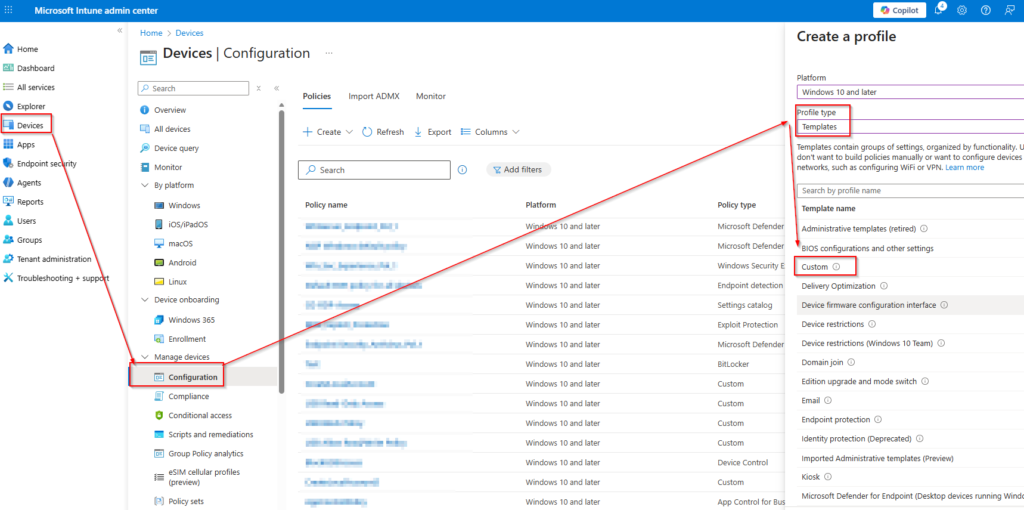
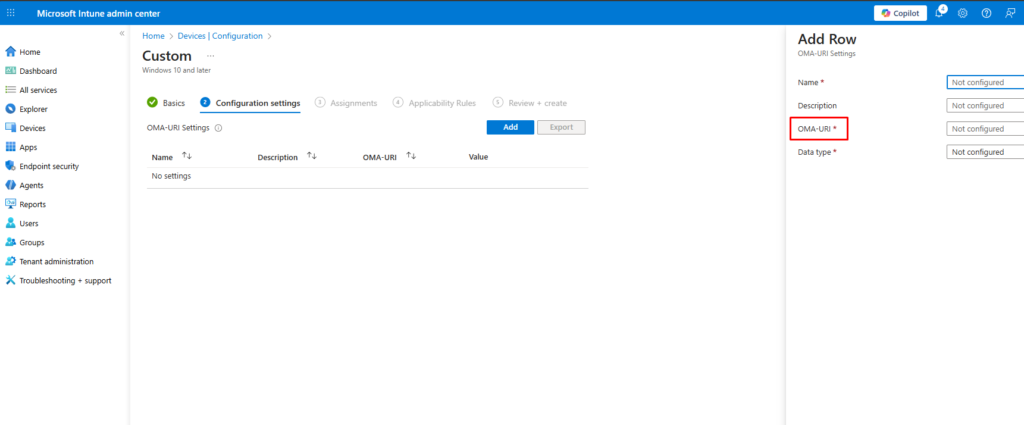
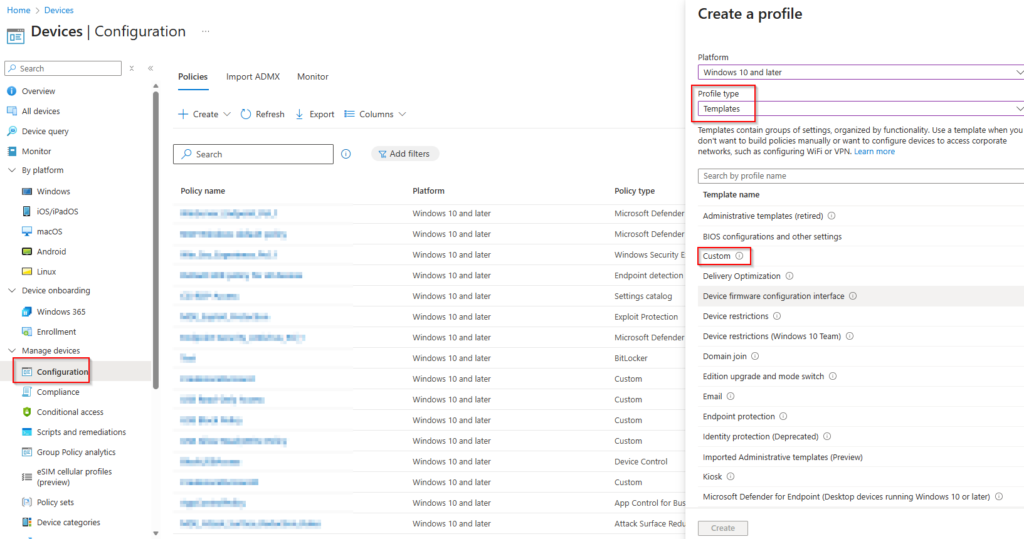
- Finally, navigate to Devices > Configuration, select Profile Type: Templates, and choose Template Name: Custom. From there, you can use OMA-URI to configure advanced settings.
OMA-URI (Open Mobile Alliance Uniform Resource Identifier) in Intune is a specific path/string used in custom device configuration profiles to target and set granular settings on Windows (and Android) devices that aren’t available in standard built-in profiles, leveraging Windows Configuration Service Providers (CSPs) to apply policies, essentially acting as a way to push specific commands or registry changes via the OMA-DM protocol.
The purpose of all the above methods is to provide you with different solutions that achieve the same goal. In my real-world scenario, I use a combination of these approaches to ensure flexibility and comprehensive coverage.
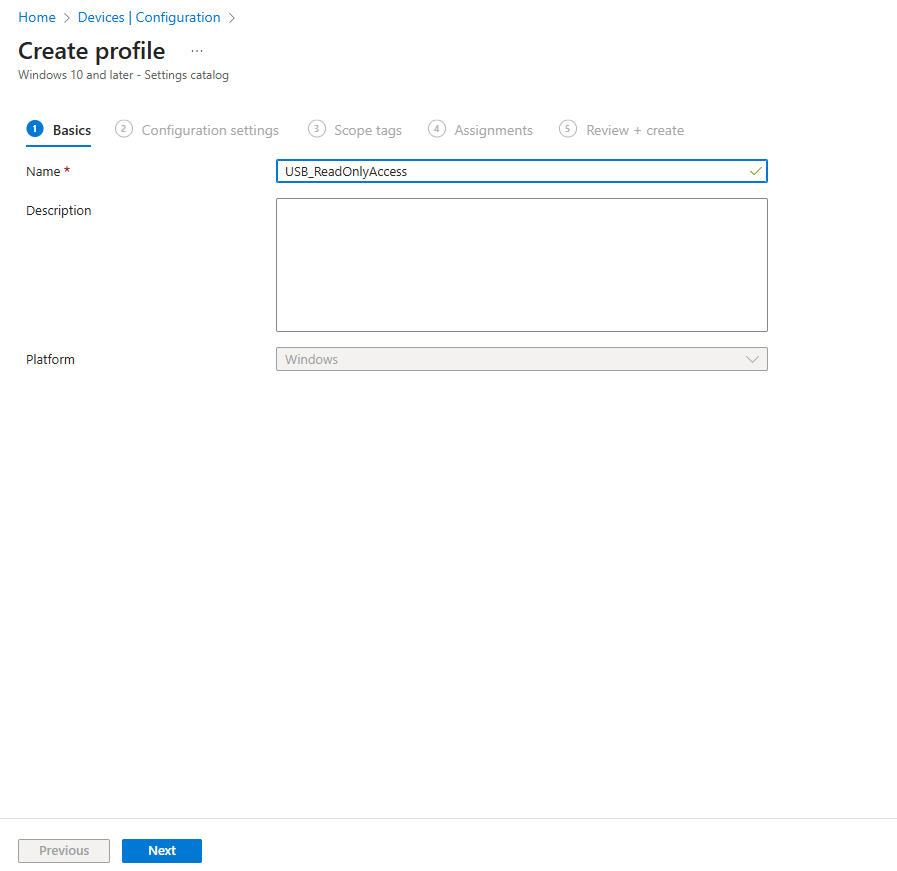
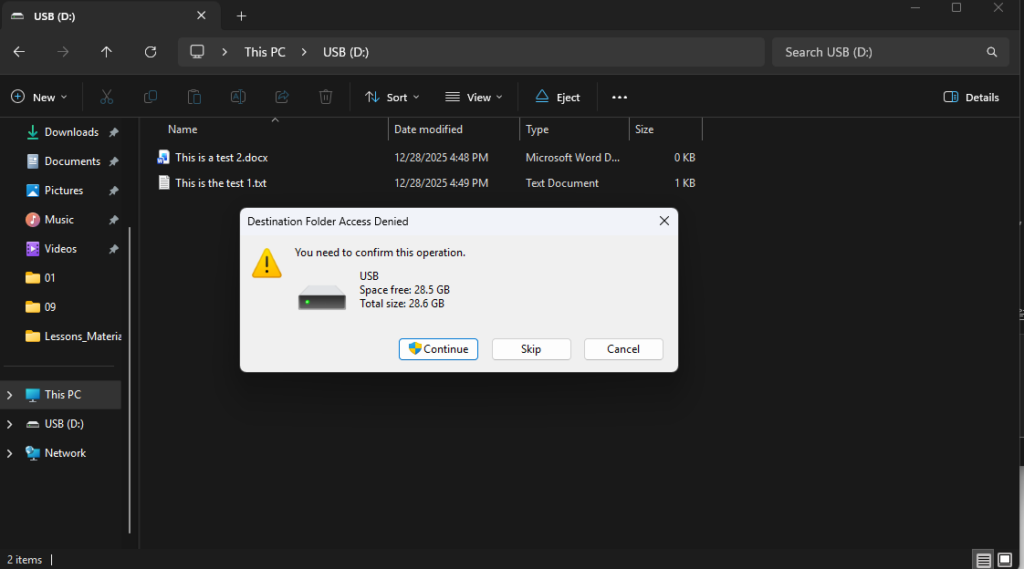
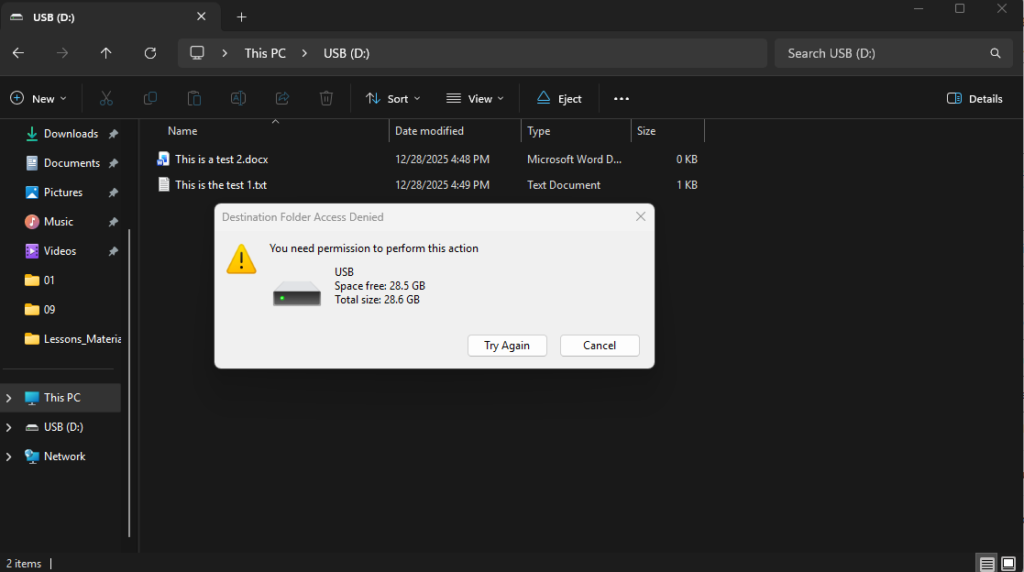
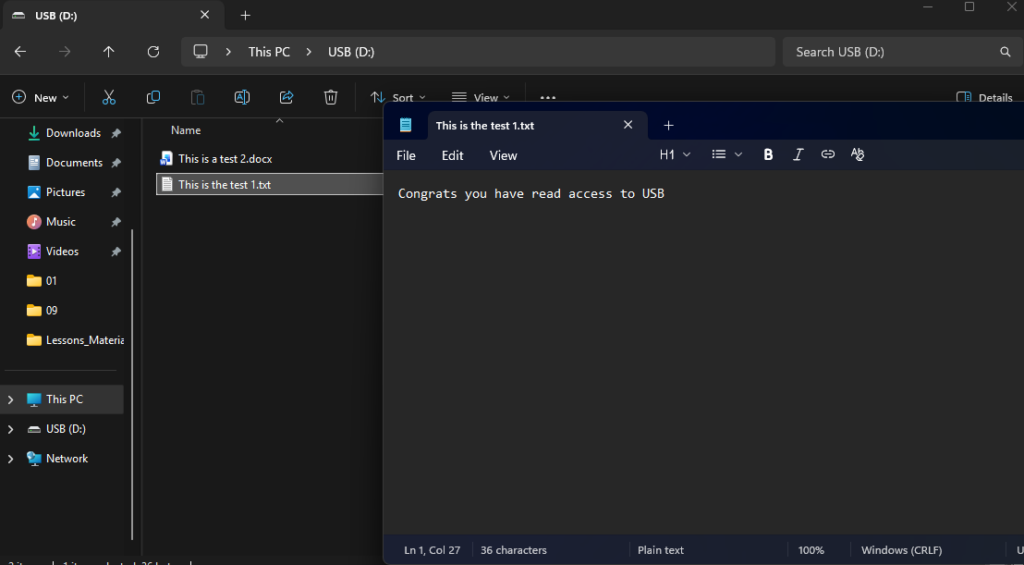
USB Read-Only Access
To grant users read-only access in your environment, please follow the steps below:
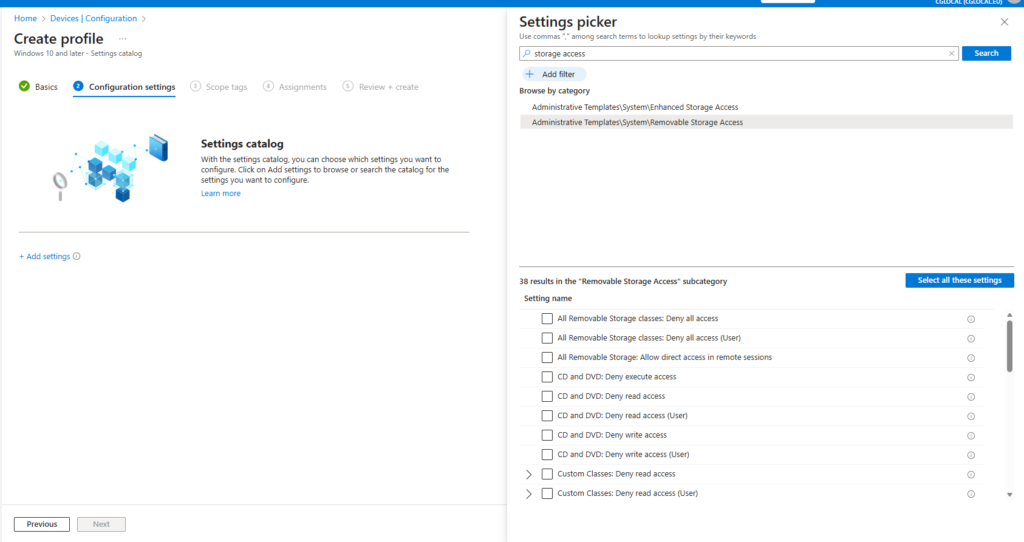
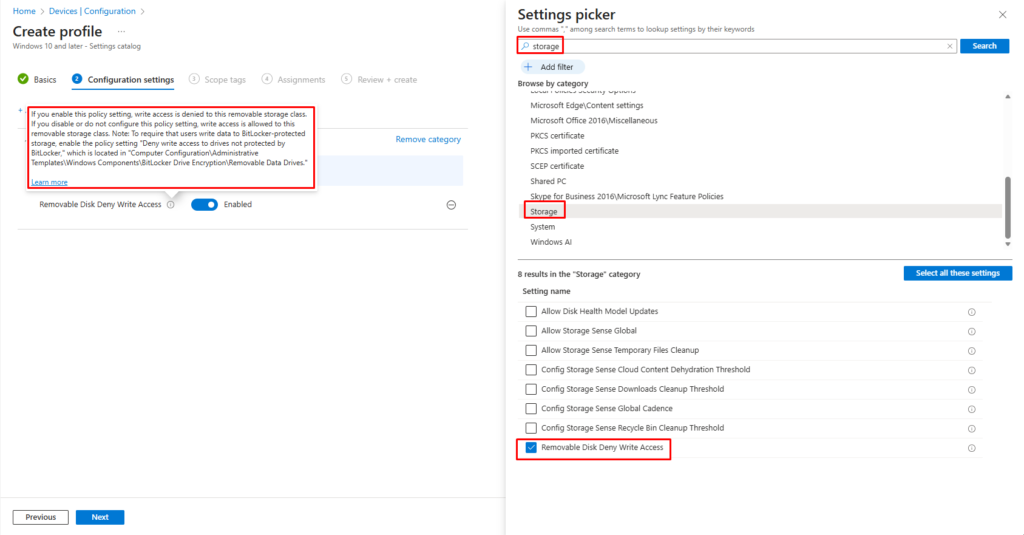
Navigate to Devices > Configuration and select the Profile Type: Settings Catalog
In the Settings Picker, search for Storage, then select Removable Disk: Deny Write Access.
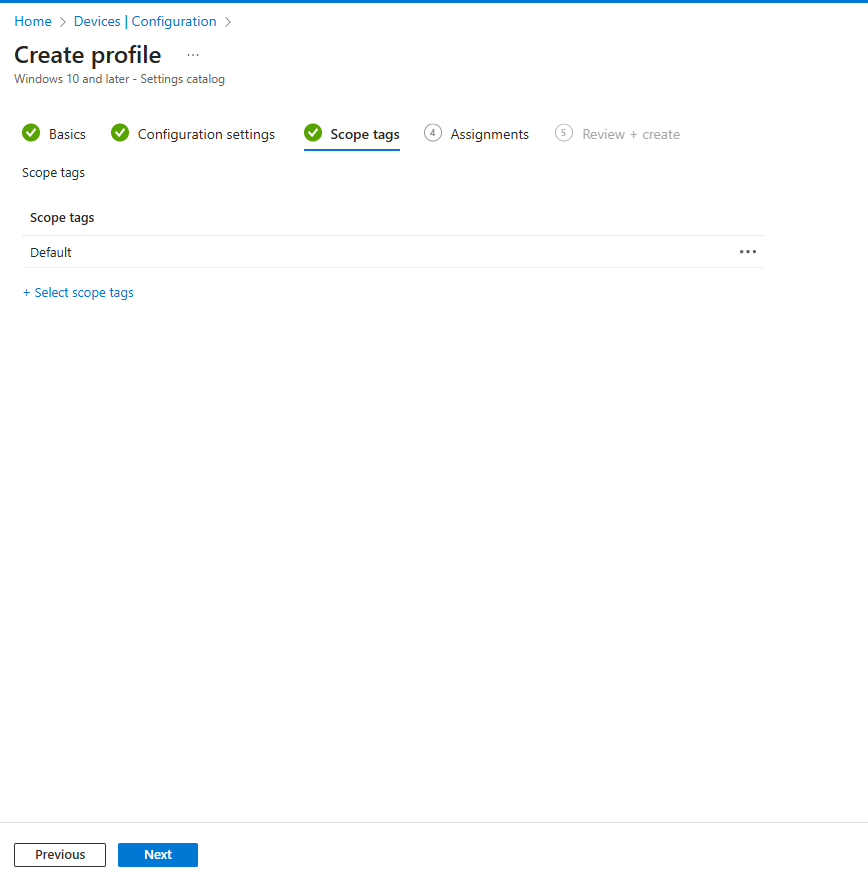
If you are using Scope tags, assign them and press Next.
In the Assignments section, I selected “All Users” to ensure everyone has read-only access. Then, I added an exclusion group for users who require Read & Write access or Block Access. This approach makes it easy to manage future requests—when a user needs write or block access, you simply add them to the designated security group. Because these groups are excluded from the read-only policy, the restriction will not apply, allowing the user full access or block as intended.

USB Read & Write Access
To create the policy for read & write access, please follow the steps below
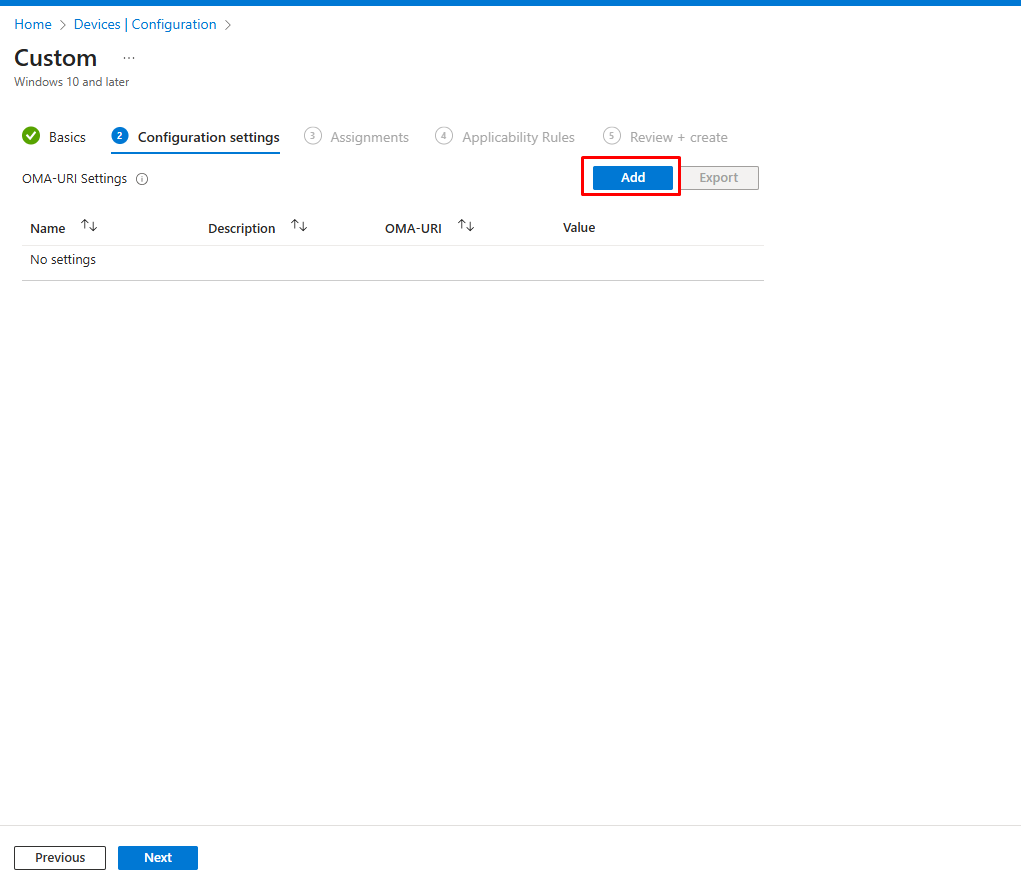
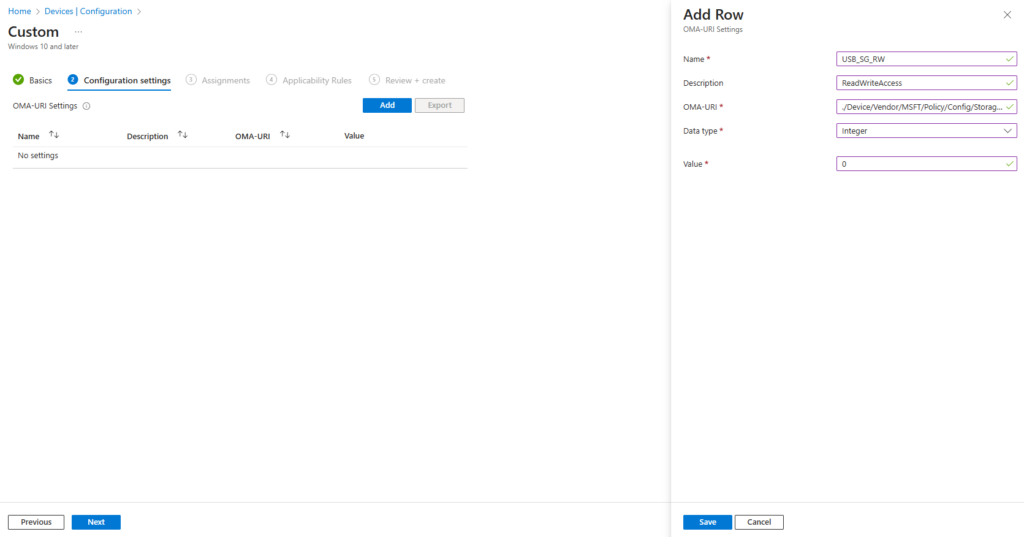
Navigate to Devices > Configuration and select the Profile Type: Templates and Template Name: Custom
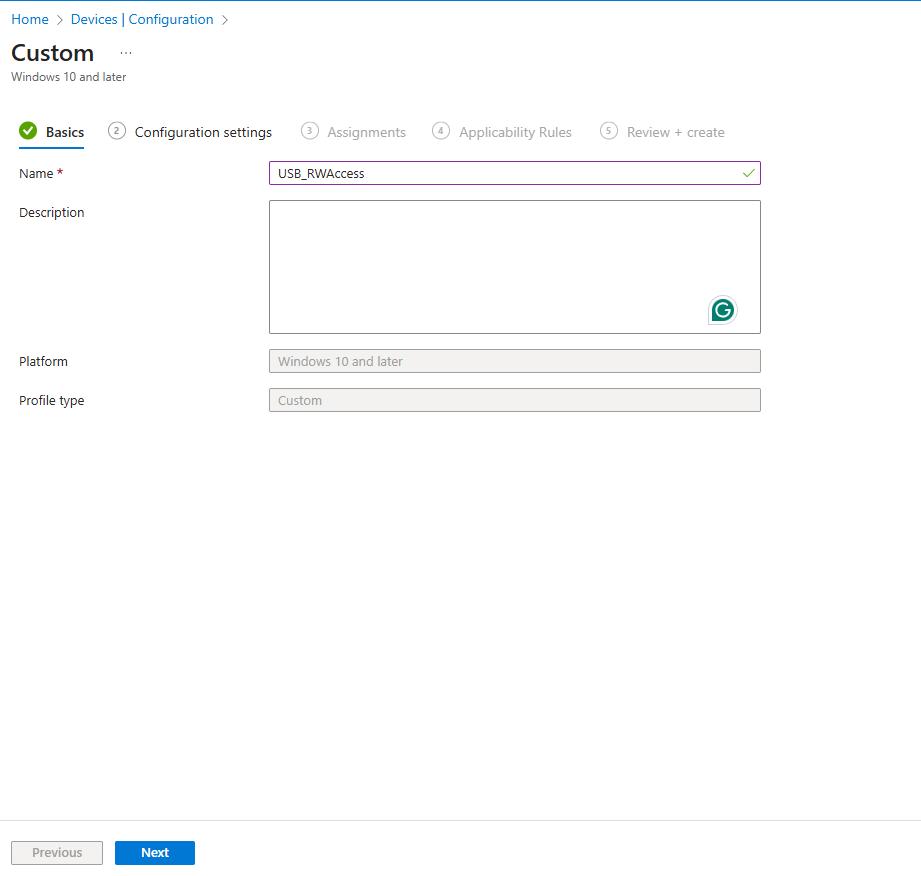
Name : USB_SG_RW
Description : ReadWriteAccess
OMA-URI : ./Device/Vendor/MSFT/Policy/Config/Storage/RemovableDiskDenyWriteAccess
Data Type : Integer
Value : 0 (0 = Allow write (and read) | 1 = Deny write (read-only))

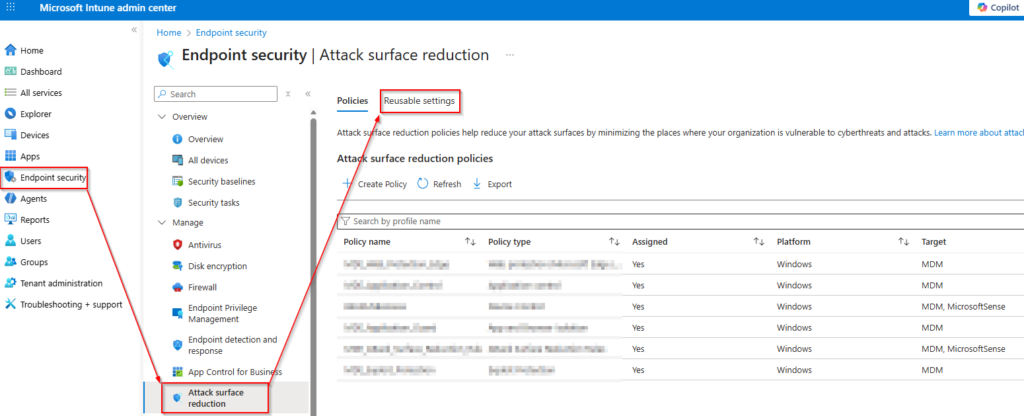
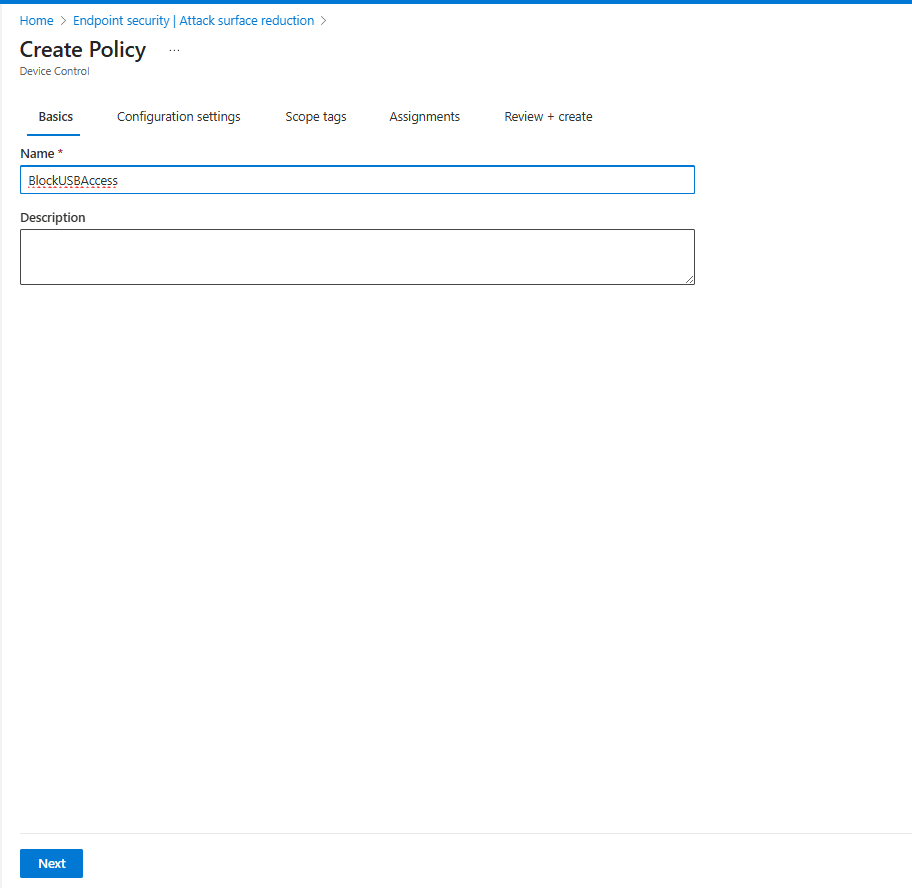
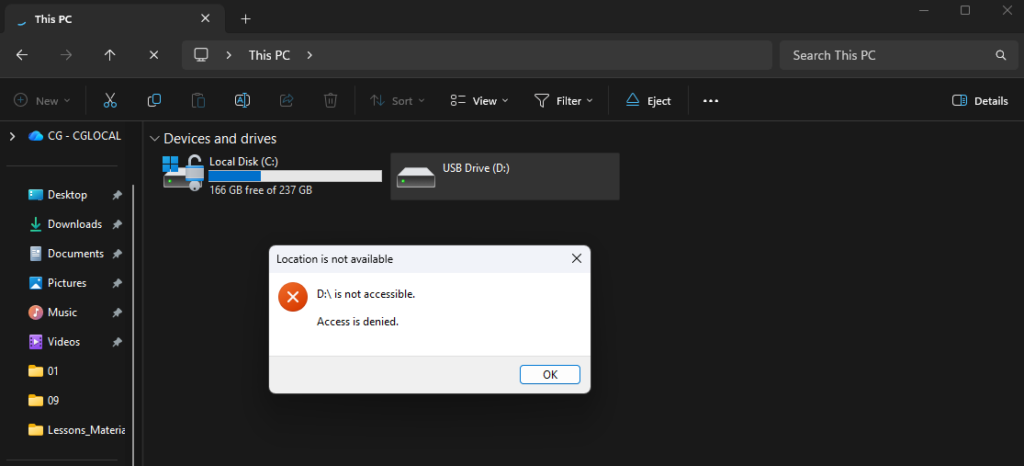
Block USB Access
To block access to USB devices, I will create an Attack Surface Reduction (ASR) profile. To do this, navigate to Endpoint Security > Endpoint Privilege Management, and then select Create Attack Surface Reduction (ASR) Profile.
What is Attack Surface Reduction (ASR)?
Attack Surface Reduction (ASR) is a security feature in Microsoft Defender that helps protect devices by minimizing the areas where cyberattacks can occur. It works by enforcing rules that restrict or block risky behaviors commonly exploited by attackers, such as:
- Preventing execution of malicious scripts or macros.
- Blocking processes are often used in ransomware attacks.
- Limiting access to vulnerable components like USB devices or network shares.
ASR rules are designed to reduce the “attack surface” of your system, making it harder for threats to gain a foothold, while still allowing normal business operations. For more information, please visit here
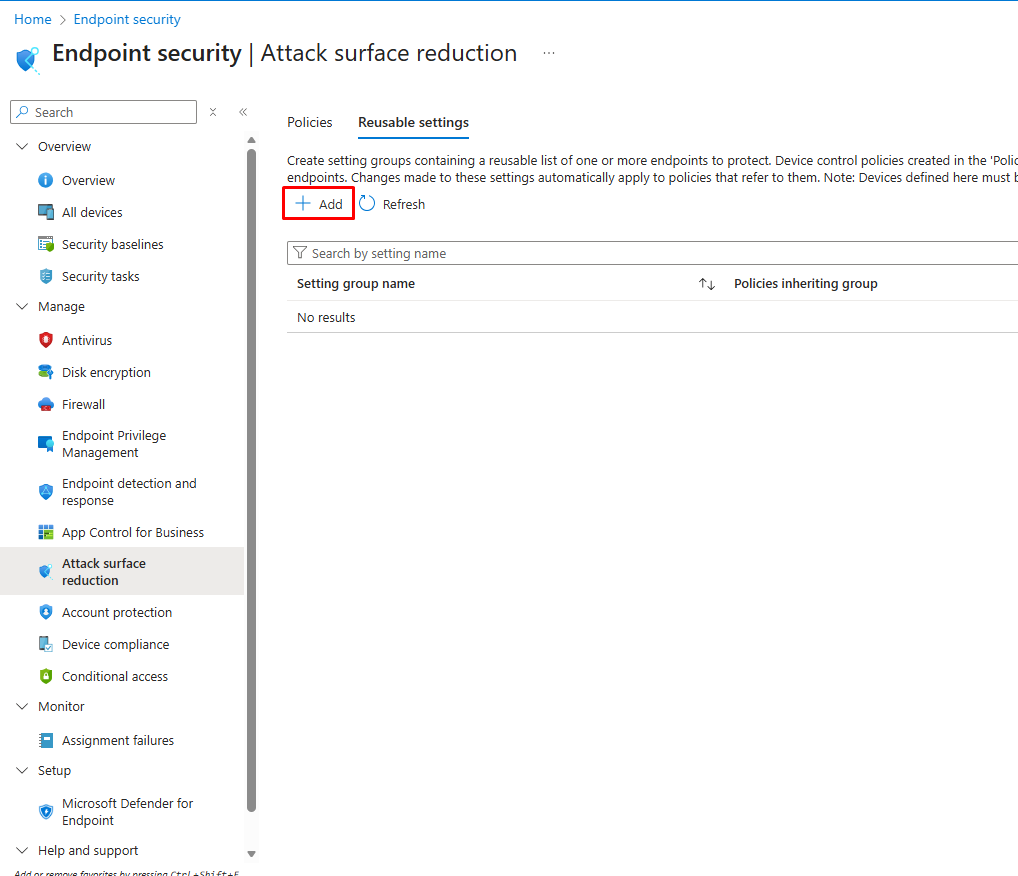
What Are Reusable Settings in ASR?
Reusable settings in Attack Surface Reduction (ASR) are predefined configurations that can be created once and applied across multiple ASR profiles. Instead of manually setting the same rules for each profile, you define them as reusable settings and link them wherever needed. This approach ensures consistency, saves time, and simplifies management.
Key Advantages:
- Consistency: Apply the same security rules across different profiles.
- Efficiency: Avoid repetitive configuration tasks.
- Flexibility: Update one reusable setting and automatically apply changes to all linked profiles.
Common Use Cases:
- Standard ASR rules for blocking malicious scripts.
- Exclusions for trusted applications or folders.
- Policies for USB device control across multiple device groups.
For more information, please visit here
Let’s proceed with the implementation.
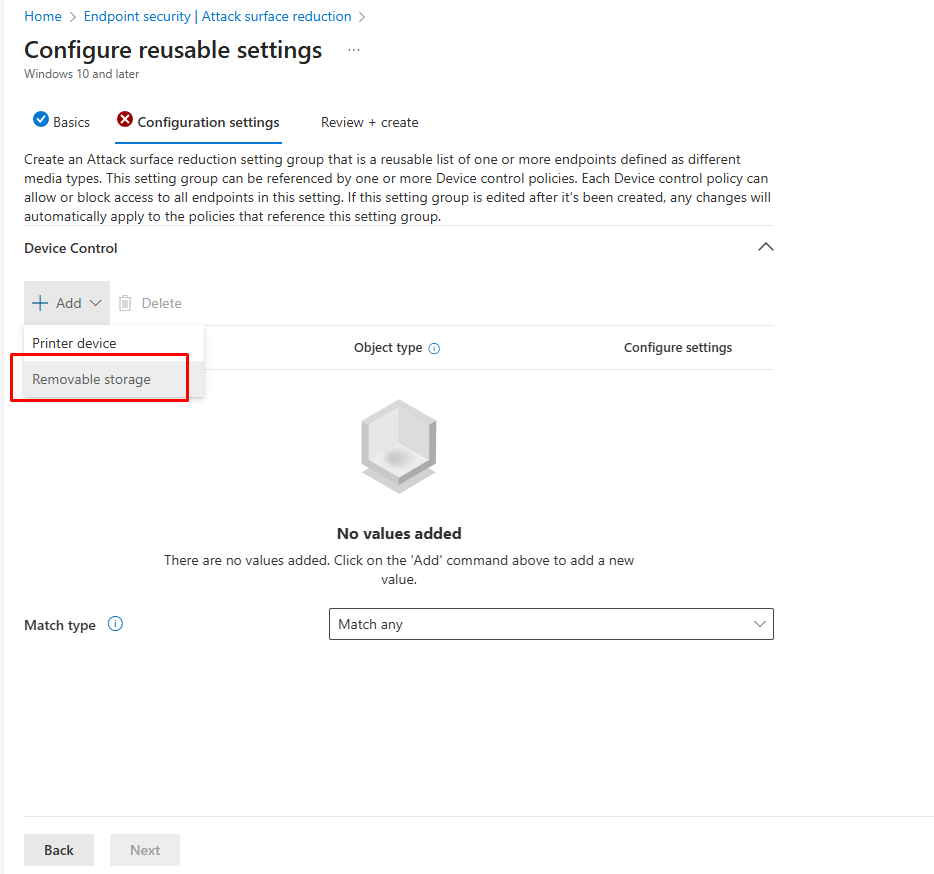
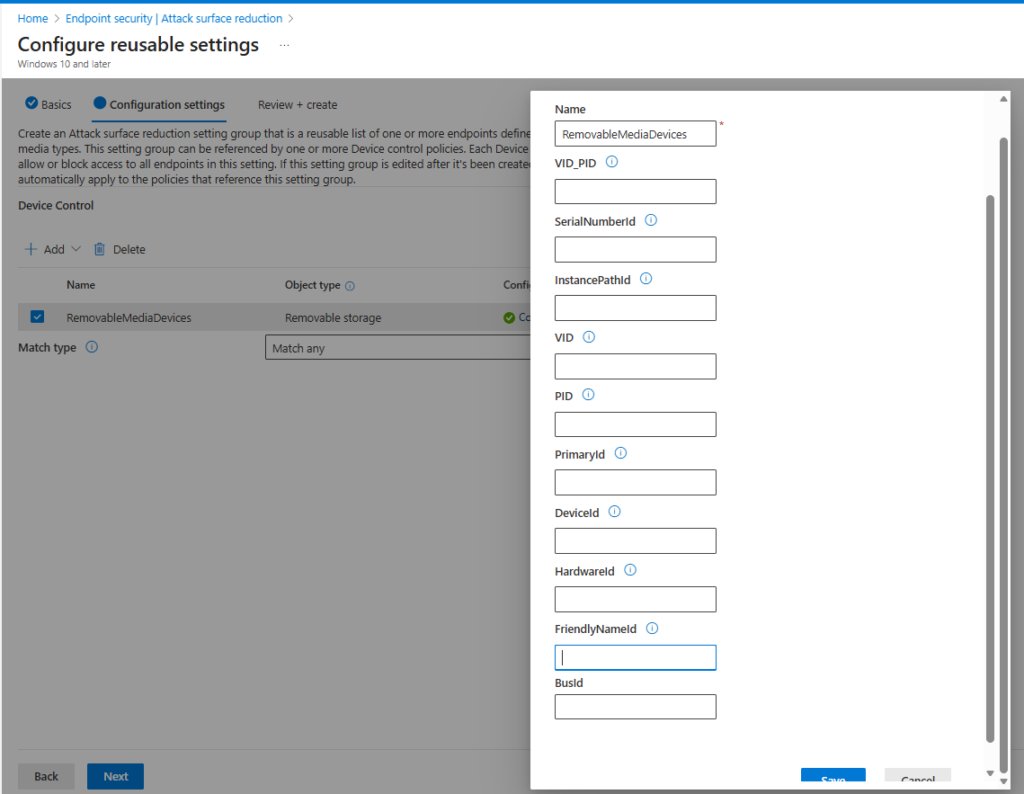
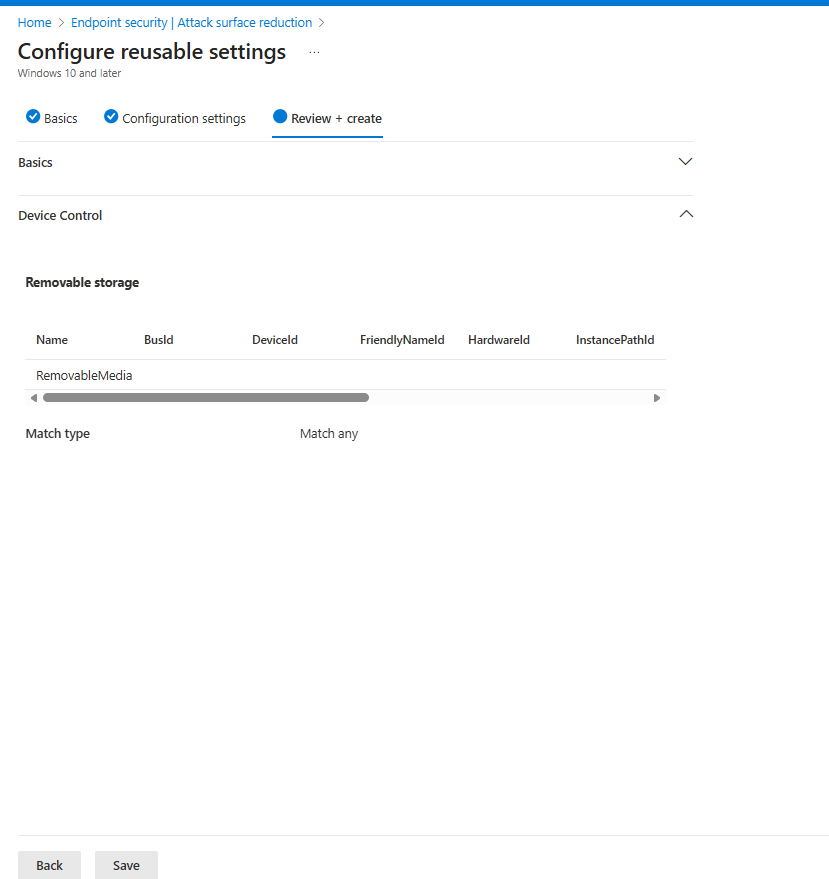
To block all removable media use the following values:
FriendlyNameId: Blank
Name: RemovableMediaDevices
PID: Blank
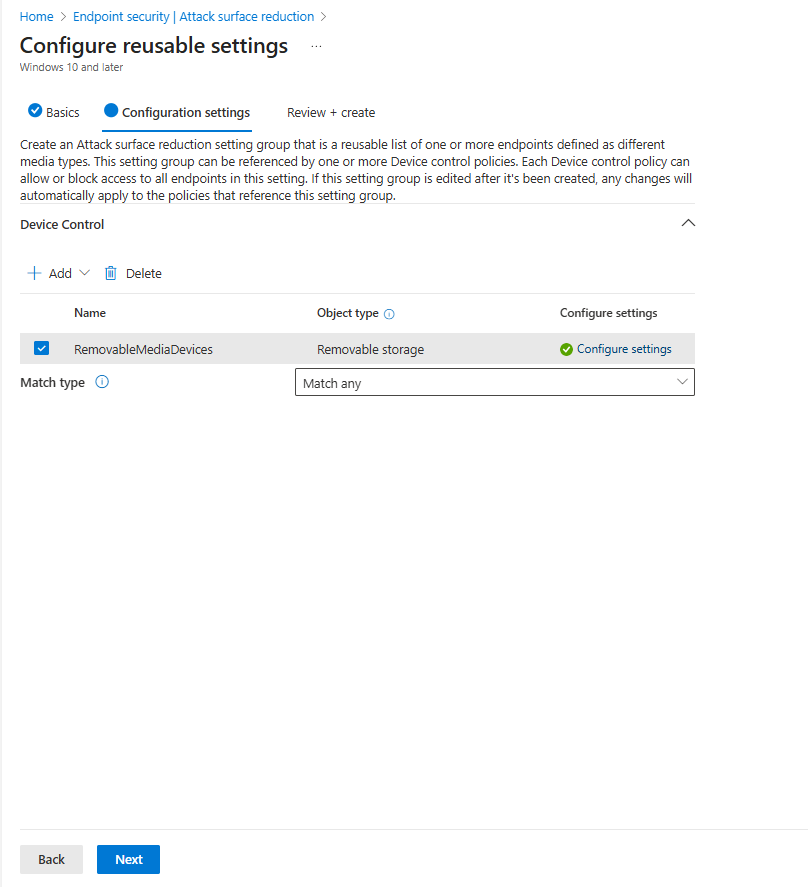
I will now create a new policy within the Attack Surface Reduction (ASR) profile.
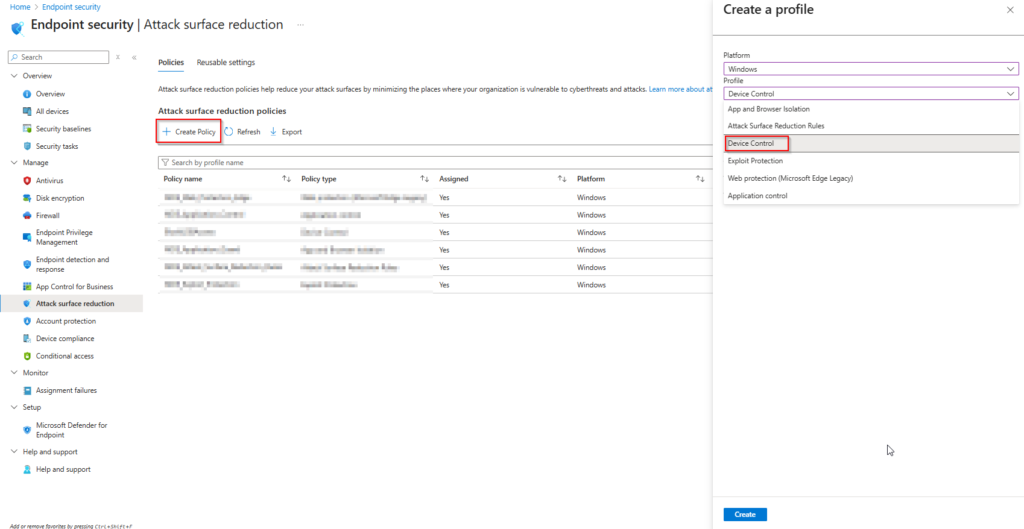
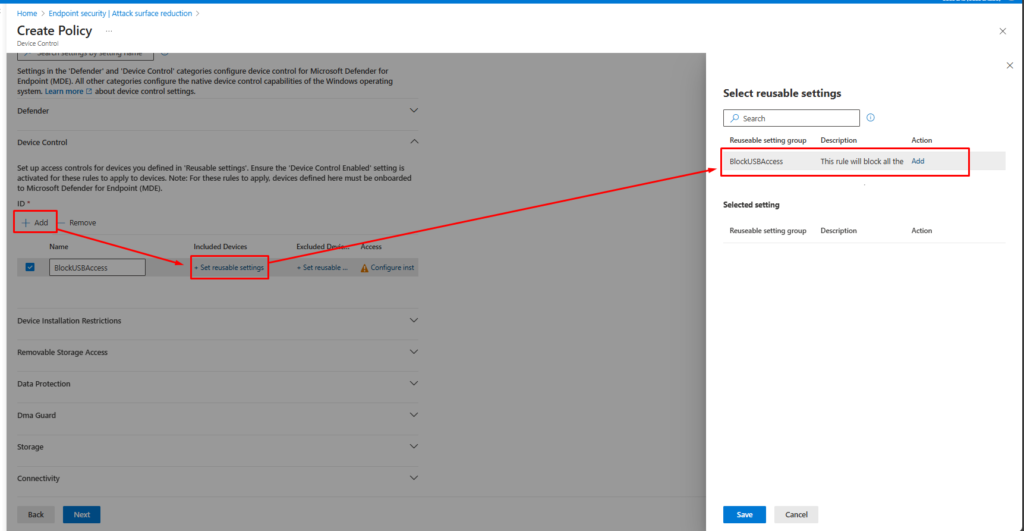
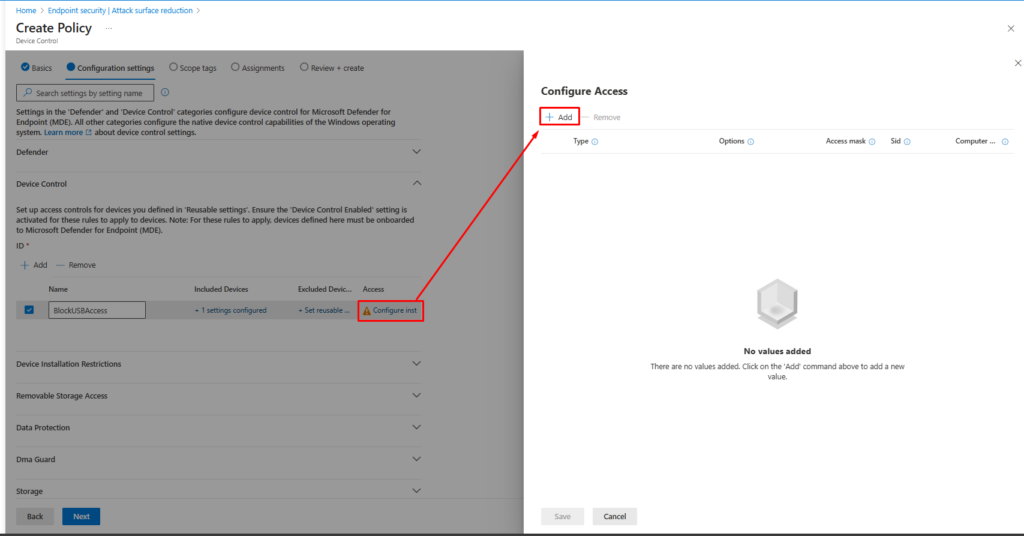
Select Device Control

Click Add, then under Included Devices, select Set Reusable Settings. A panel will appear showing the reusable setting groups you created earlier. Locate your reusable policy (e.g., BlockUSBAccess) and click Add. Finally, select Save to apply the setting.
Under the Access column, click Configure Settings. In the next panel titled Configure Access, select + Add to create a new access rule.
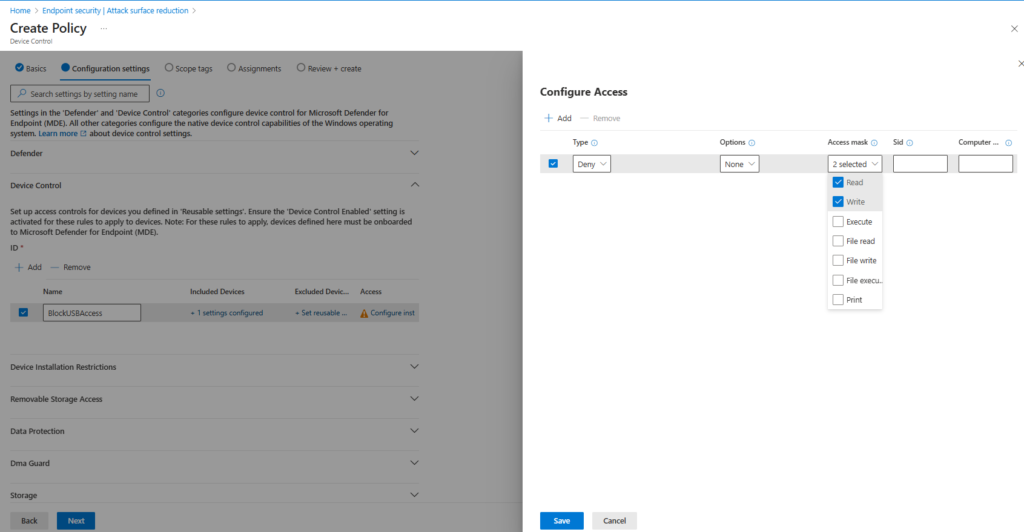
At this stage, configure the access rule to deny permissions. In the Configure Access panel, set the Type to Deny, then select the permissions you want to block—specifically Read and Write—from the Access mask options. Click Save to apply the changes.
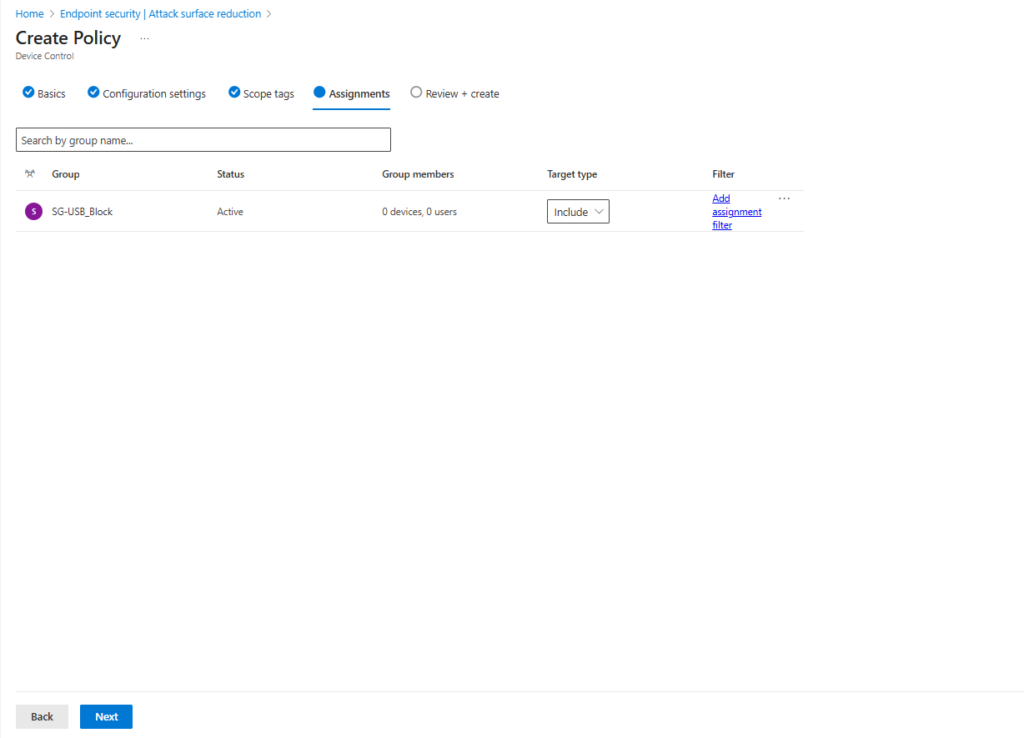
In the Assignments section, select the security group designated for users who should be blocked from accessing USB devices.
What to Expect: Results
Let’s see what the results are regarding the above policies.
USB Read Only Access

Block USB Access
Conclusion
In this article, I explained how to block USB access using Microsoft Intune and outlined three different approaches: Settings Catalog, Attack Surface Reduction (ASR), and Custom Templates with OMA-URI. In my real-world scenario, I used a combination of all three methods to achieve comprehensive coverage.
Please note that this reflects my experience from a live environment. There are other ways to accomplish the same goal, and you can also choose to implement just one of these solutions based on your organization’s needs.
I hope this guide helps you secure your environment against potential threats, such as unauthorized data transfers or malware introduced through USB devices—especially when dealing with non-technical users who might unknowingly create risks.
Your feedback is always welcome!!!